
Appearance
Walkthrough Tour
This walkthrough guides you through obtaining a trial license, creating compute clusters, loading data, running SQL statements, and connecting to a third-party tool. It assumes that you have completed a public installation of Yellowbrick.
Overview
The walkthrough includes the following steps:
- Request and install a trial license.
- Create the following two compute clusters:
a. One for data loading
b. One for querying - Load sample data.
- Create a role and users.
- Run SQL statements.
- Connect to DBeaver.
1. Request and Install a Trial License
- Log in to Yellowbrick Manager. A banner indicating an unlicensed installation is displayed at the top of the page.
- Click the banner link or navigate to Instance Management → Instance Management → License.
Note: Instance Management is accessible by using the cube icon in the left pane.
- Apply for a trial license. You will receive the license key through an email within a few minutes (check your Junk or Spam folder if necessary).
- Click Install a License. Copy the license key from the email and paste in to the text field.
- Upon installation, you will receive a 30-day trial license supporting up to 128 vCPUs.
2. Create Two Compute Clusters
Yellowbrick Manager supports managing multiple compute clusters. Initially, only the instance you named during deployment is displayed.
Perform the following steps:
a. Create the small-query Cluster:
- Navigate to Instance Management → Compute Clusters. An empty grid is displayed.
- Click Cluster.
- Create a cluster named "small-query" with one small node (latest version). Default settings include the following:
- Auto-suspend after 5 minutes of idle time.
- Auto-resume on query execution (initial SQL statements might take a few minutes).
- Default Workload Management Profile.
- Wait a few minutes for Kubernetes to provision the hardware.
b. Create the small-load Cluster:
- Repeat the above process to create a
small-loadcluster with same settings. - Verify that both clusters appear in the grid.
3. Load Sample Data
- Navigate to Query Editor (third icon "
>-" in the left pane). - Create the "yellowbrick_trial" database.
- Click Sample Catalog and select Premier League Database.
- Choose Setup/Load 1.
- Ensure small-load is selected in the Cluster dropdown and yellowbrick_trial is selected as the database.
- Click Run to execute the pre-populated SQL statements. After completion, the
premdbschema should contain five tables. - Load additional data:
- Clear the SQL editor.
- Select Premier League Database → Setup/Load 2 from the Sample Catalog.
- Run the SQL statements to populate the
newmatchstatstable with 774,540 rows.
4. Create a Role and Users
- Navigate to Instance Management → Access Control → Roles.
- Click Role to create an analyst role with default cluster and no additional privileges.
- Go to the Users tab and click User to create two users:
- "ybtools10"
- "ybapps10"
- Assign both users to the analyst role with small-query as their default cluster.
- Set user passwords.
Note: Use single sign-on with MFA in production environments.
Grant Permissions:
In the Query Editor, run the following:
sql
GRANT USAGE ON CLUSTER "small-query" TO analyst;
ALTER USER ybtools10 SET search_path TO premdb;
ALTER USER ybapps10 SET search_path TO premdb;
5. Run SQL Statements
Perform the following steps:
- Grant the
analystrole access to tables:
sql
GRANT SELECT ON ALL TABLES IN SCHEMA premdb TO analyst;- Log out and log back in as ybtools10.
- Choose yellowbrick_trial as the Database.
- In Query Editor, confirm cluster settings:
sql
SELECT * FROM current_cluster();
SELECT default_cluster();- Choose small-query as the Cluster, if not pre-selected.
- Run the following SQL statements to retrieve match statistics:
sql
SELECT t1.season_name, t1.winners, homegoals + awaygoals AS total
FROM (
    SELECT season_name, winners, SUM(SUBSTR(ftscore, 1, 1)::int) AS homegoals
    FROM premdb.season JOIN premdb.match ON season.seasonid = match.seasonid
    GROUP BY season_name, winners
) t1
JOIN (
    SELECT season_name, winners, SUM(SUBSTR(ftscore, 3, 1)::int) AS awaygoals
    FROM premdb.season JOIN premdb.match ON season.seasonid = match.seasonid
    GROUP BY season_name, winners
) t2 ON t1.season_name = t2.season_name
ORDER BY 1, 2;
6. Connect to DBeaver
Perform the following steps:
- Download DBeaver and install it.
- Create a new database connection:
- Navigate to Database → New Database Connection → Yellowbrick.
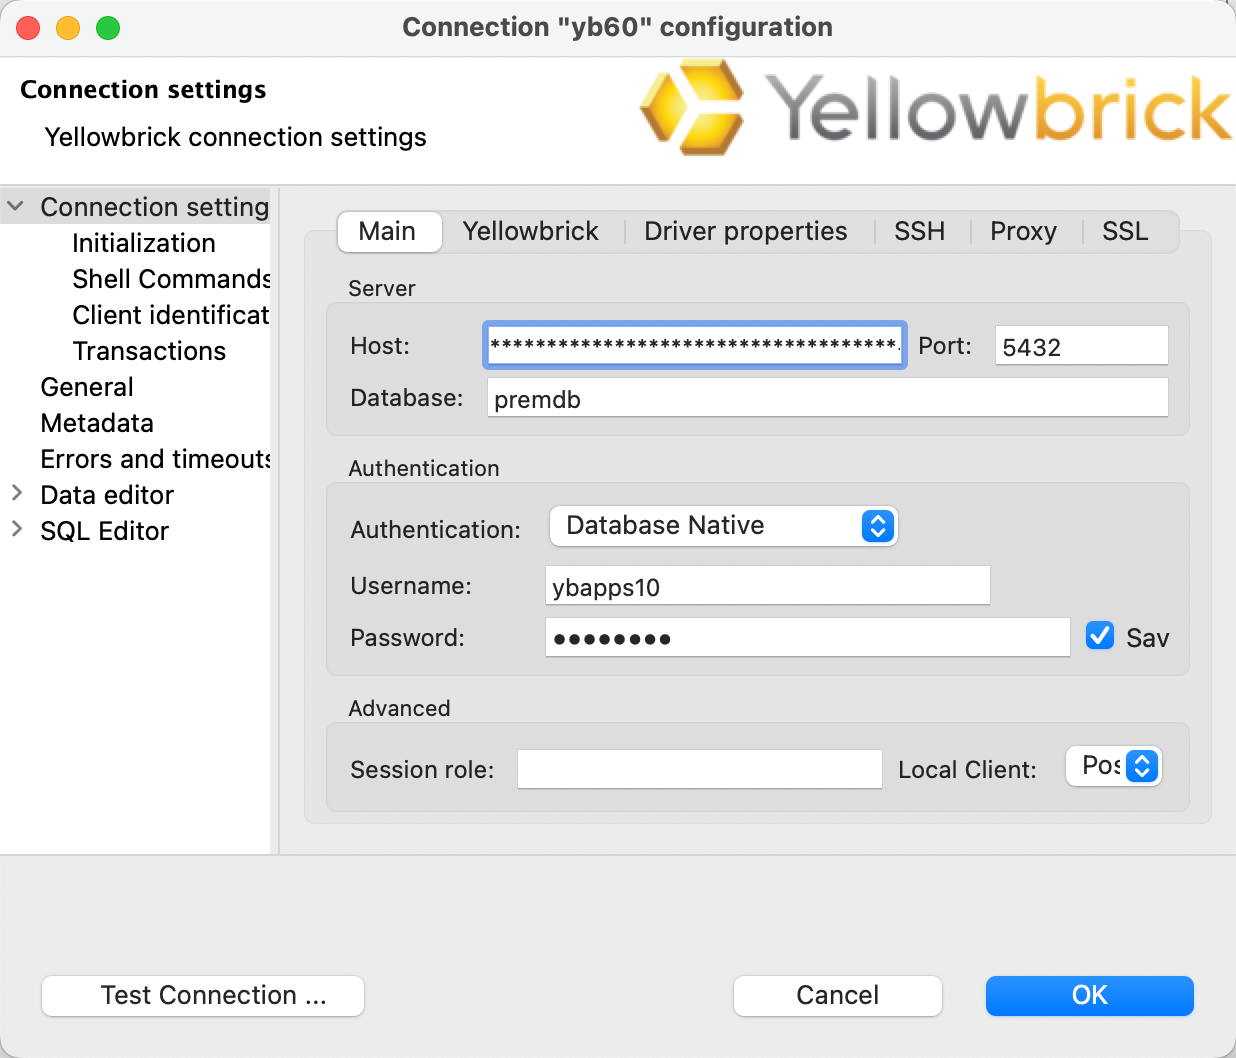
- Enter the values for the following:
- Host: Take the Host/Port from the Instance Management page of the Yellowbrick Manager
- Database: "yellowbrick_trial"
- Username: "ybapps10"
- Password: Enter password for the Username ybapps10
Sample Connection Setup:
View the Database in DBeaver:
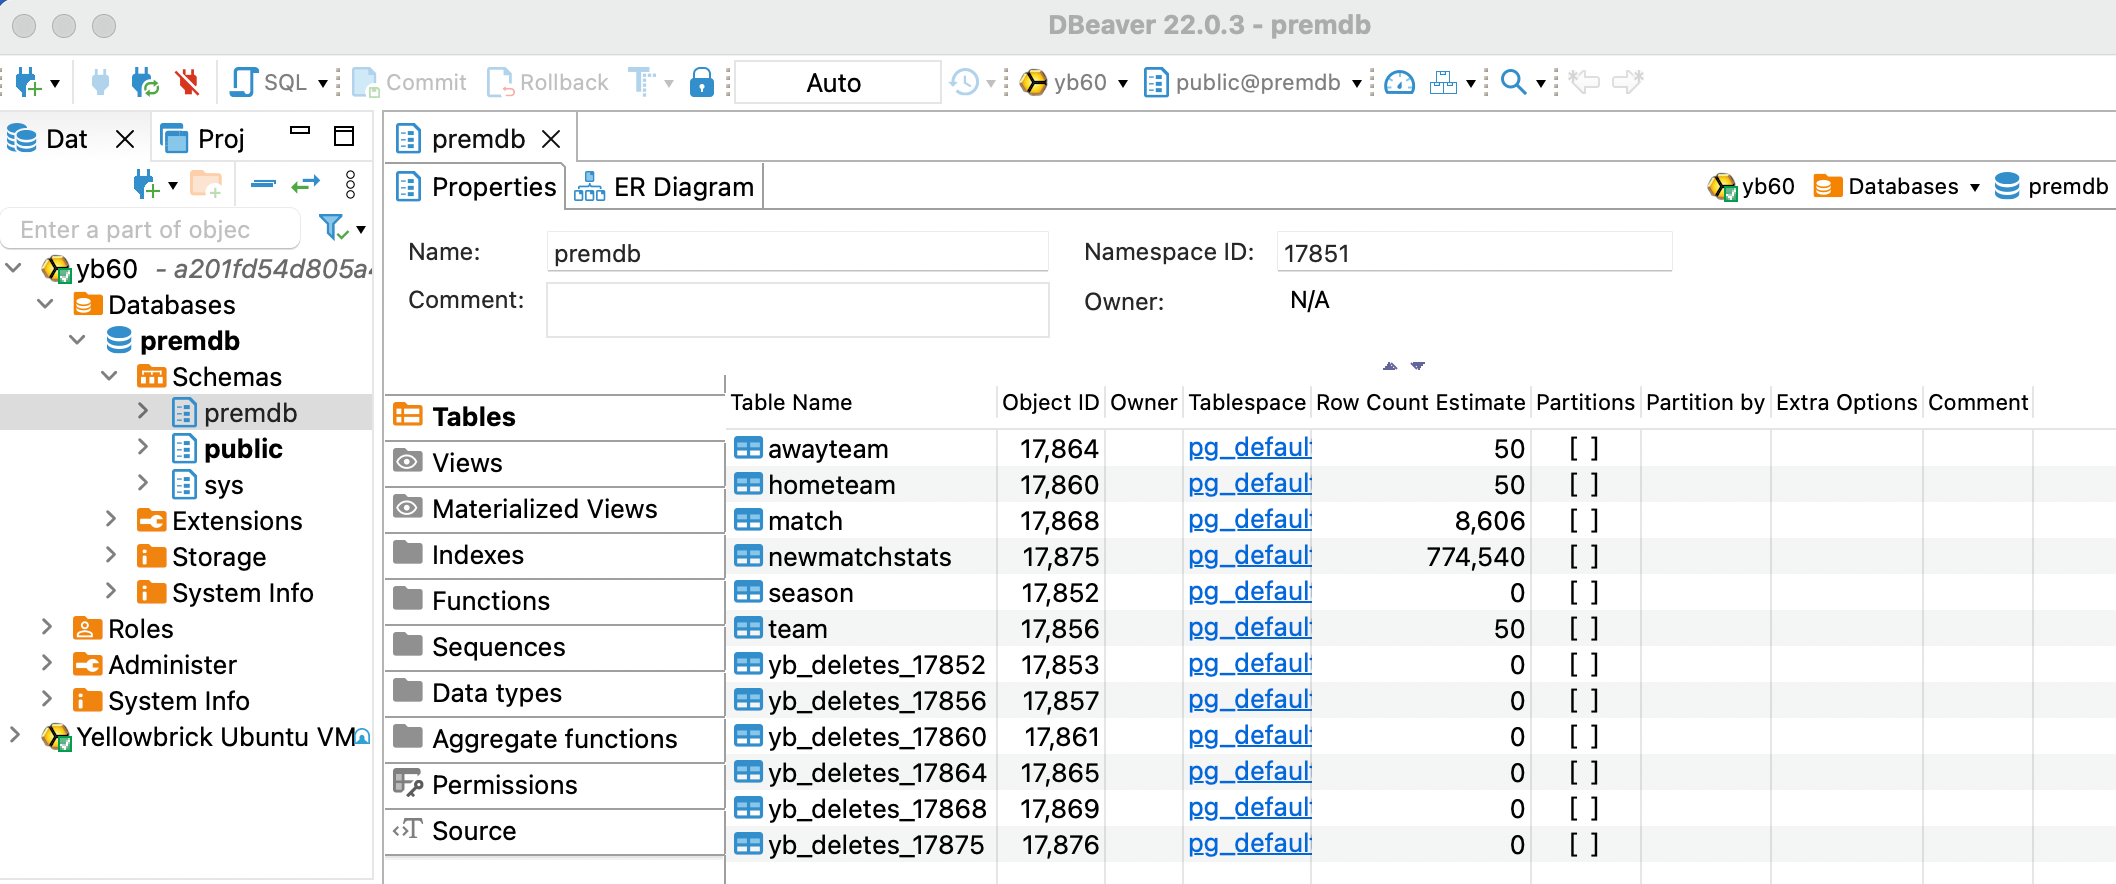
You can now run SQL statements as ybapps10 within DBeaver.
✅ You have successfully completed the walkthrough.