Appearance
Azure Public Installation Instructions
Prerequisites
On Azure, you need a resource group and the ability to manage IAM access for it, as you must have the permissions to create and assign roles within that resource group.
It is recommended to use a dedicated resource group to isolate resources and simplify access management, such as by having owner permissions for that resource group.
You can use the Azure Portal to launch the interactive Deployer. However you must also be logged in to the Azure CLI in order to create the template spec as outlined below. Also, you'll need to make sure you can access the network the deployer is running in from a web browser.
Quota
The following minimum Compute quota limits are required to successfully run the Deployer.
| Quota name | Value |
|---|---|
| Standard DDSv5 Family vCPUs | 16 |
| Standard Dv5 Family vCPUs | 16 |
| Standard LSv3 Family vCPUs | 32 |
| Total Regional vCPUs | 60 |
Launching the Deployer
NOTE
By installing Yellowbrick Enterprise Edition software into your Cloud Account, you agree to Yellowbrick’s Enterprise Edition EULA.
The Azure Deployer is based on Azure Resource Manager.
One-Click Deploy on Azure
Click the button below to launch Yellowbrick Deployer via the Azure portal.
Launch on AzureDeployer Interactive Installer
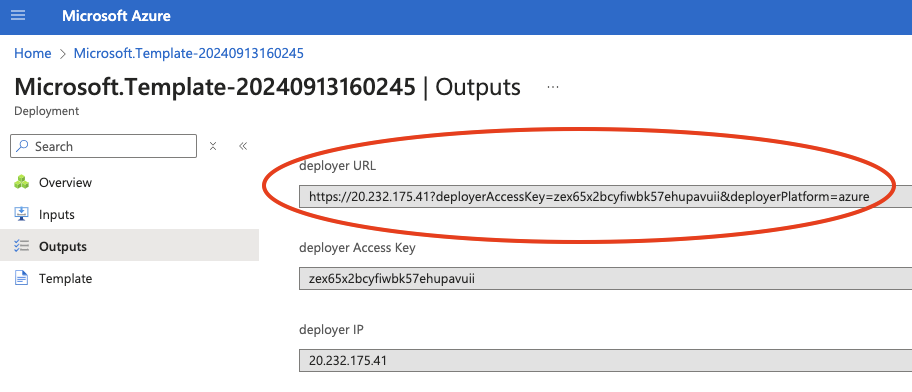
Once the deployment is completed, you will find the URL of the interactive Deployer in the output panel:
Deploying via Azure Command Line Interface (az cli)
You can launch the deployer in your azure subscription using the az command line interface. Locate a public key you will use for ssh access, and launch the command below:
bash
% az stack group create \                                                                                                                                                         :(
  --resource-group <resource group name> \
  --template-uri https://ybinstallerprod.blob.core.windows.net/7-3-0-74895-181ea900/deployment.json
When prompted, provide your ssh public key. The public key must begin with the string ssh-rsa or ssh-ed25519. You may also pass your public key as an extra parameter this way:
bash
% az stack group create \                                                                                                                                                         :(
  --resource-group <resource group name> \
  --template-uri https://ybinstallerprod.blob.core.windows.net/7-3-0-74895-181ea900/deployment.json \
  --parameters sshPublicKey='ssh-rsa ....<your-public-key>'
When the deployment is finished, a JSON document is presented which will contain outputs you will use to launch the deployer user interface or connect to the ip address via ssh.
The outputs will contain a fragment which looks like this:
json
    "outputs": {
      "deployer": {
        "type": "String",
        "value": "https://20.1.152.227?deployerAccessKey=xu7zkdfz5k5qazbfizu4l2g3po&deployerPlatform=azure"
      },
      "deployer Access Key": {
        "type": "String",
        "value": "xu7zkdfz5k5qazbfizu4l2g3po"
      },
      "deployer IP": {
        "type": "String",
        "value": "20.1.152.227"
      },
      "vm Name": {
        "type": "String",
        "value": "yb-deployer-ycxydoqcmo3ji"
      }
    },
You may launch the deployer web user interface with the url given for deployer, or connect via ssh with the deployer IP with user azureuser:
bash
% ssh azureuser@20.1.152.227

azureuser@yb-deployer-ycxydoqcmo3ji:~$ ls -l /opt/ybd/
total 276152
-rwxr-xr-x 1 root       root             538 May  9 12:12 bootstrap.sh
-rw-r--r-- 1 yb-install yb-install       224 May  8 23:31 environment
-rwxr-xr-x 1 yb-install yb-install       127 May  8 23:31 get-access-key
drwxr-xr-x 2 yb-install yb-install      4096 May  8 23:31 helm-charts
drwxr-xr-x 4 yb-install yb-install      4096 May  8 23:29 image
-rwxr-xr-x 1 yb-install yb-install 282751272 May  8 23:29 yb-install
Deploying via an Azure Portal
The deployer template can be downloaded here: Deployer Template
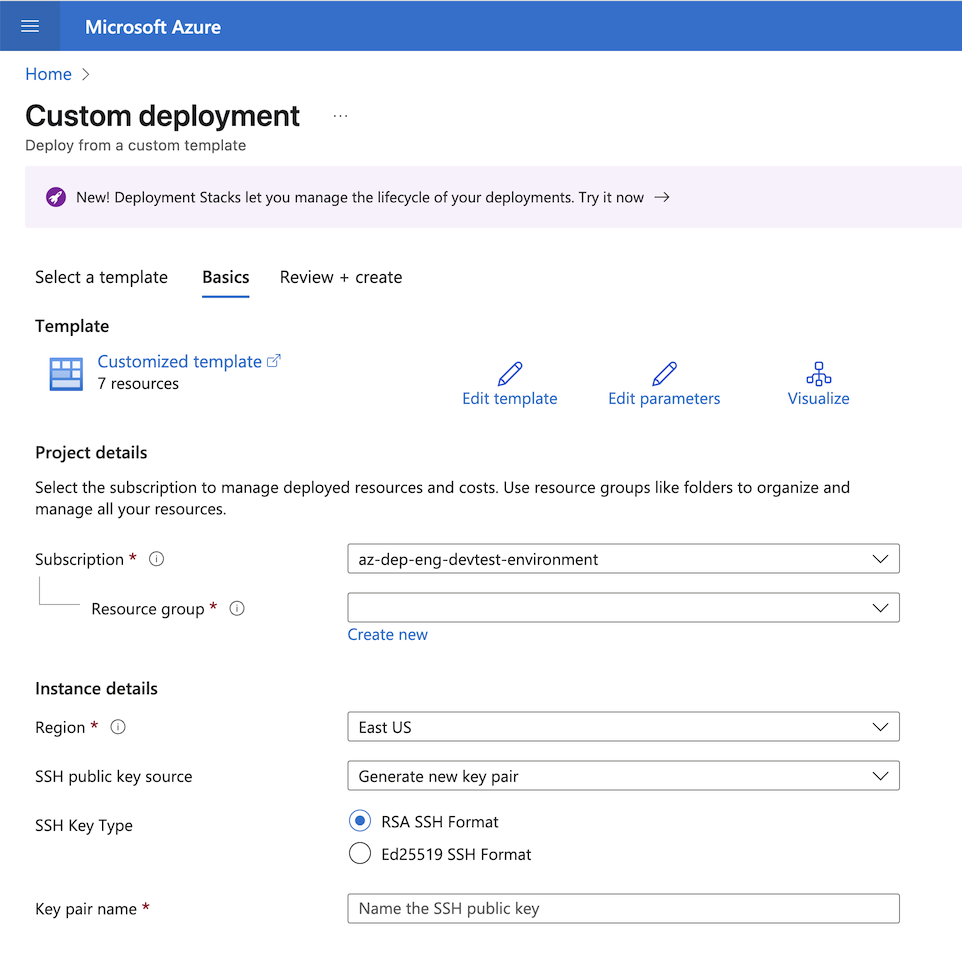
To use this template in the Azure Portal:
- Download the template
- Visit Azure Portal Custom Deployment
- Choose the option "Build your own template in the editor"
- Load the deployer template you downloaded to your local machine, and press Save
The custom deployment will appear with instructions to choose or create an ssh public key used to launch the deployer.
Cleanup
To remove the Deployer, navigate to the Azure Deployment Stacks service in the Azure portal under the resource group you used to create the Deployer. Select the deployment stack you created and named to install the Deployer and delete the deployment stack. For the "Managed Resources" options shown, choose the option to "Delete resources" vs. "Detach resources", which will remove the Azure VM instance and associated resources for the Deployer.