Appearance
Loading a Table via the Load Assistant
You can use the Yellowbrick Manager Load Assistant to automate the process of loading a table from files in object storage. In the background, SQL commands are generated and run to complete this procedure, culminating with a step that loads the table from qualifying source files in the specified bucket or container.
You can see the syntax of the SQL commands as you go along. To get more information about these commands, or if you prefer to run them manually, see SQL Commands.
Note: Normally you would need your account information and credentials ready at hand before loading tables. When you are loading anonymously from a public bucket or container, as in this tutorial, no credentials are required. This example loads from AWS S3 data, but the steps are the same when you load from Azure object storage.
- Create the
premdbsample database and run both setup scripts, as described under 3. Load with the Small Cluster. - Launch the Load Assistant from one of the following locations:
Yellowbrick Manager Home page
The Load Data button in the left pane of the Yellowbrick Manager:

The Databases tab (Actions > Load Data)
The Dashboard for the current instance (Actions > Load Data)
- Select your instance, the
premdbdatabase, and the default running cluster if these values are not pre-populated. - Select the external location called
premdbs3data. - Clear the Suffix field (defaults to
/). - Select Specific Files, then enter the string
/premdb/newmatchin the File Prefix field.
This string defines the prefix for one or more files in a public S3 bucket. The system will look for all matching files that reside in the bucket named by the external location object. In this example, you will see one file:
premdb/newmatchstats25mil.csvImportant: If you do not filter by Specific Files or Pattern, the system will attempt to load all the files in the specified location. In turn, the load will only proceed if files are found that have the correct layout of source fields and data types for the target table.
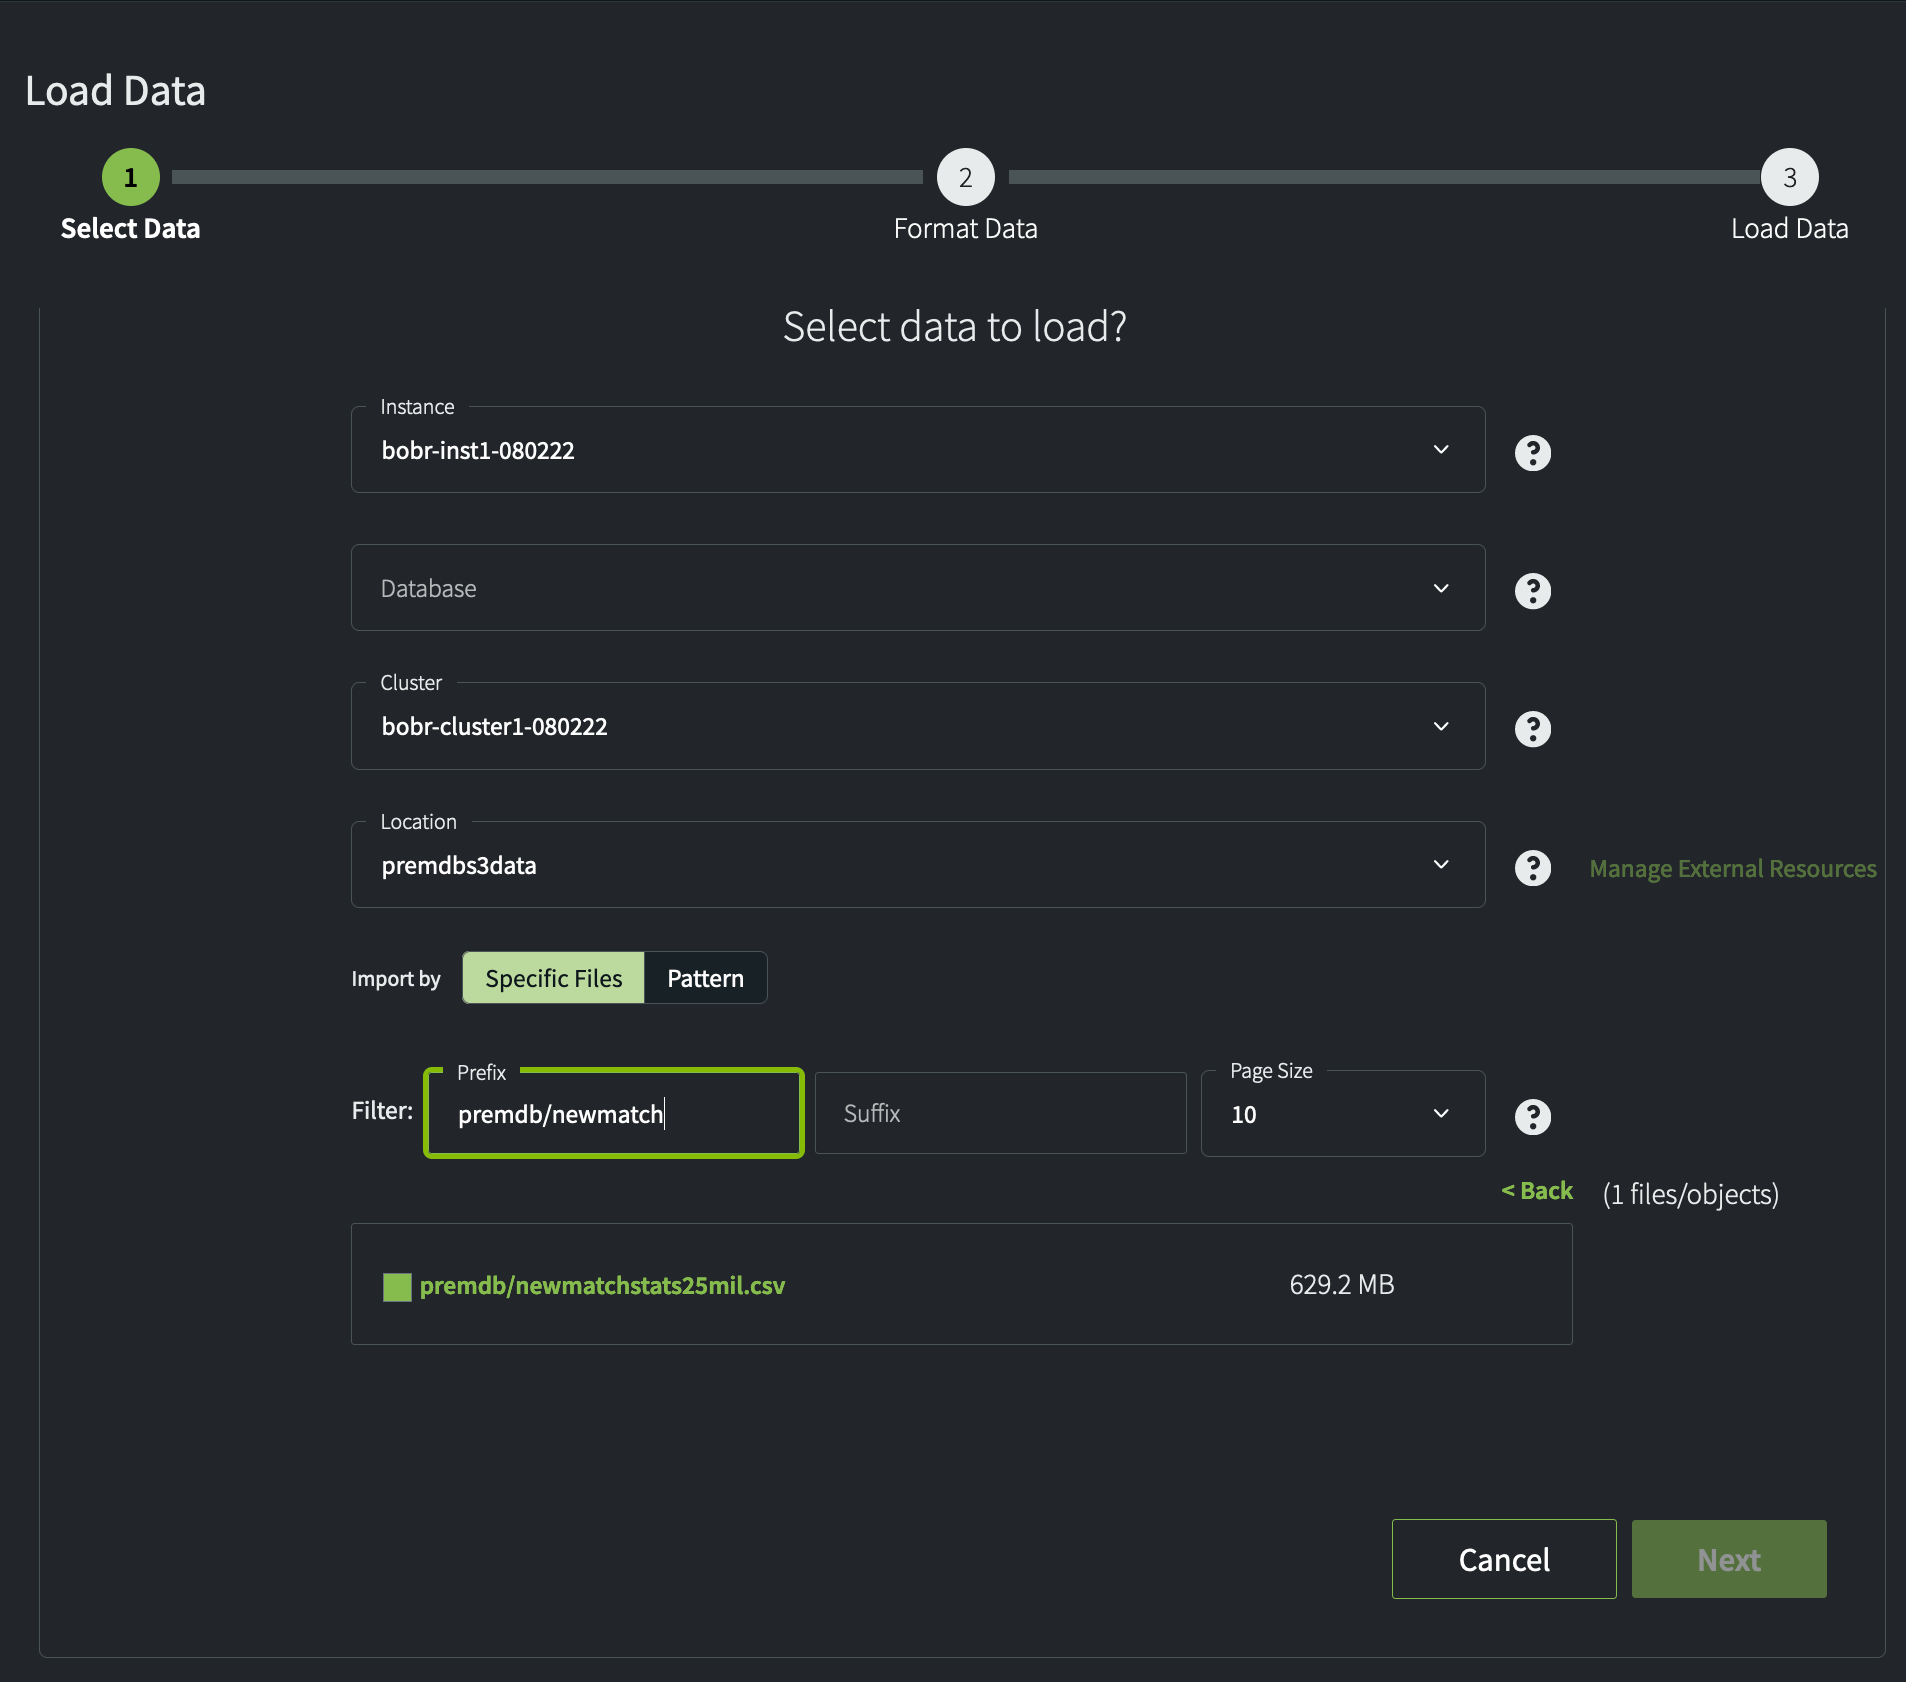
Select this file and click Next to proceed.
See also Notes on the Manage External Resources Option.
- On the Format Data page, accept the default format and click Next.
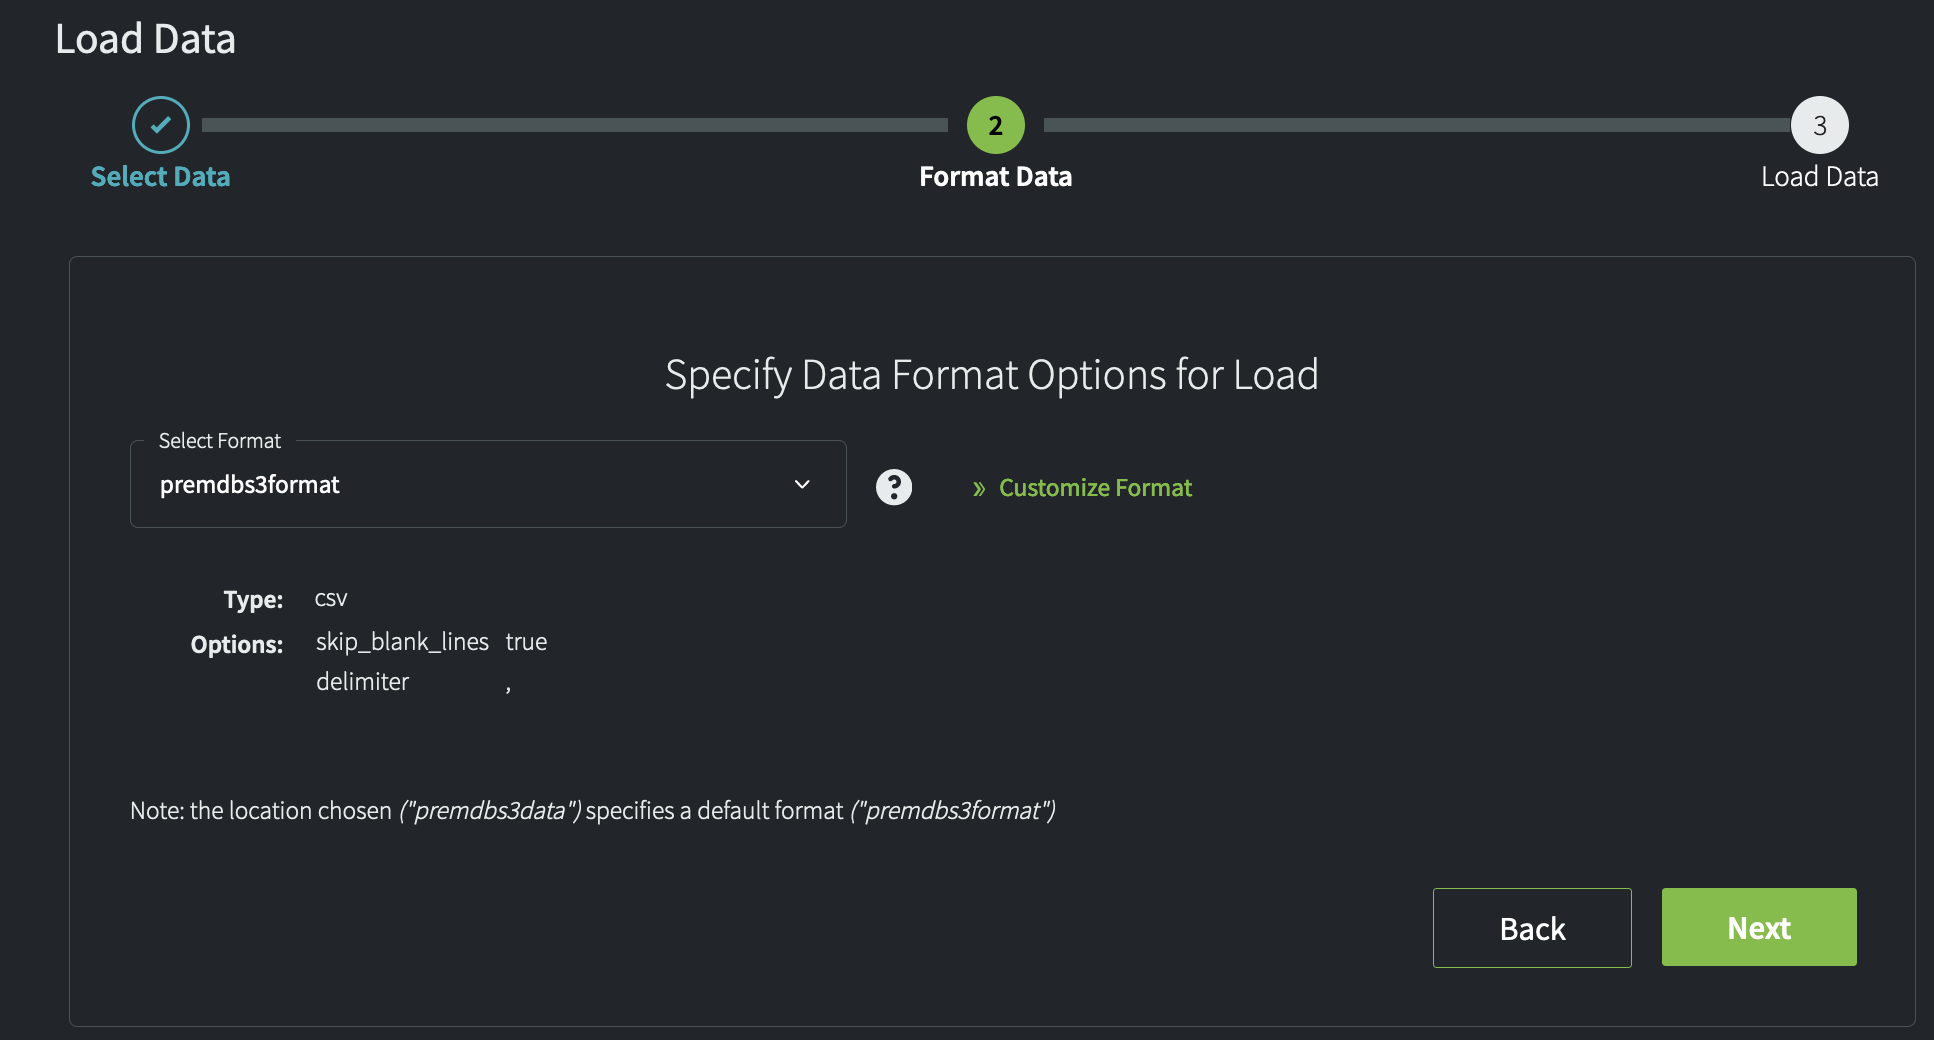
In the context of this tutorial, using the default format (premdbs3format) that is associated with the external location (premdbs3data) is recommended. Alternatively, you can click Customize Format and explicitly set the format options you want to use.
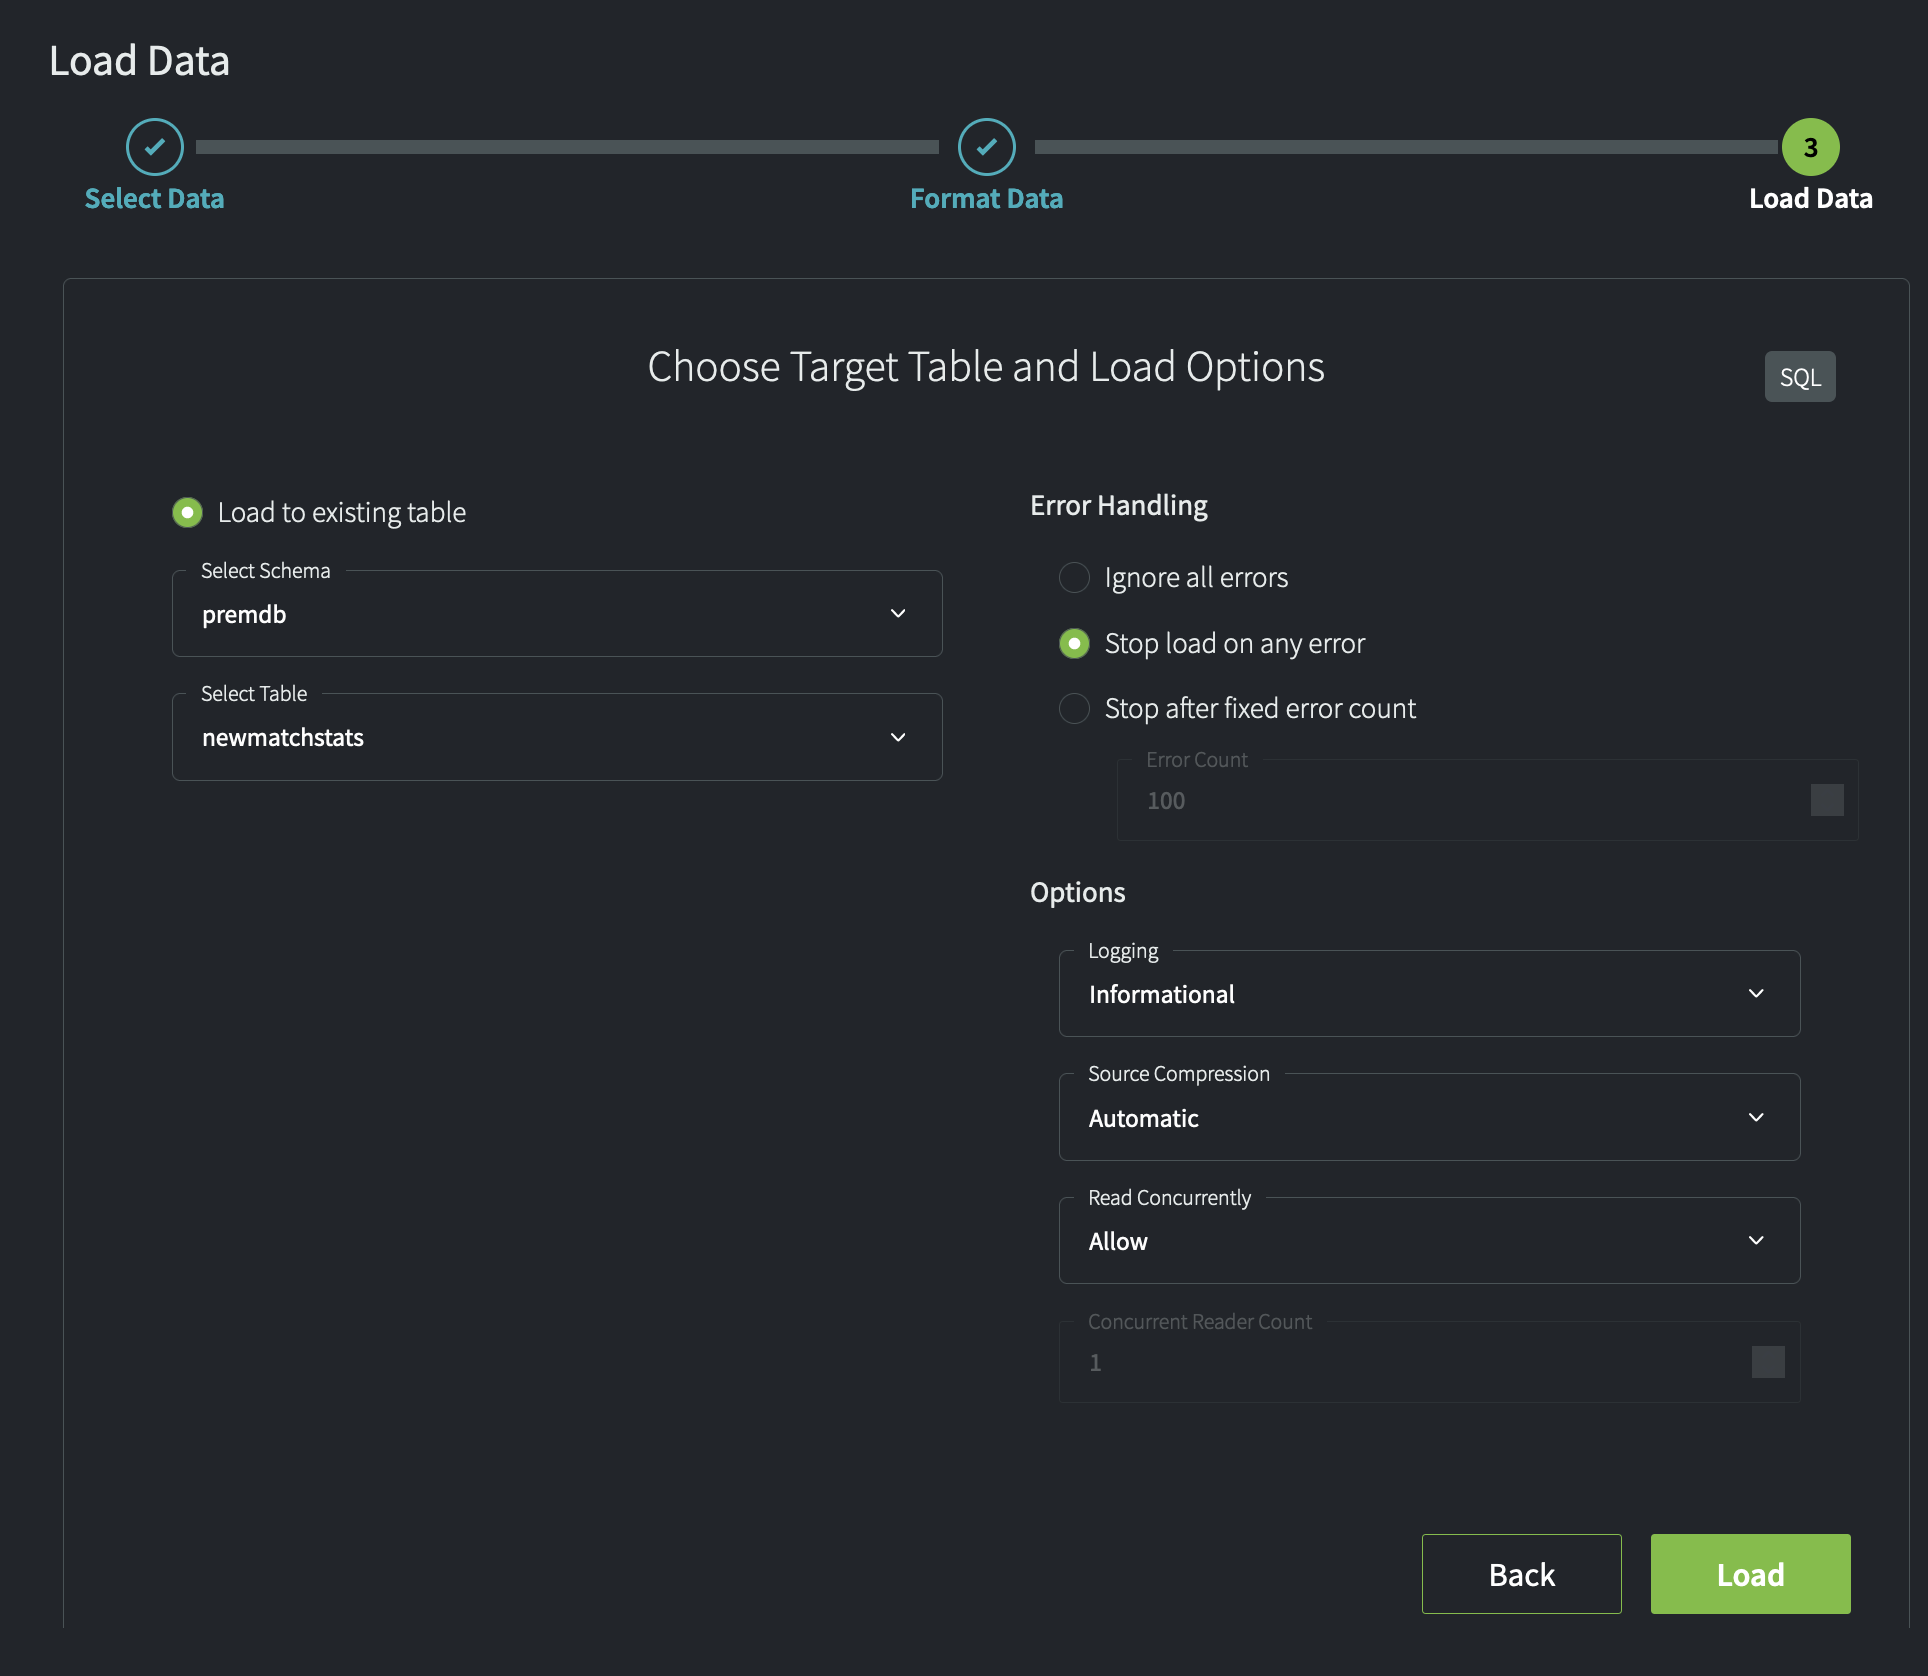
- Select the target schema (
premdb) and table (newmatchstats), accept the default values for error handling and load options, and click Load.
- Run the load and watch its progress. When it is complete, you will see a load summary:
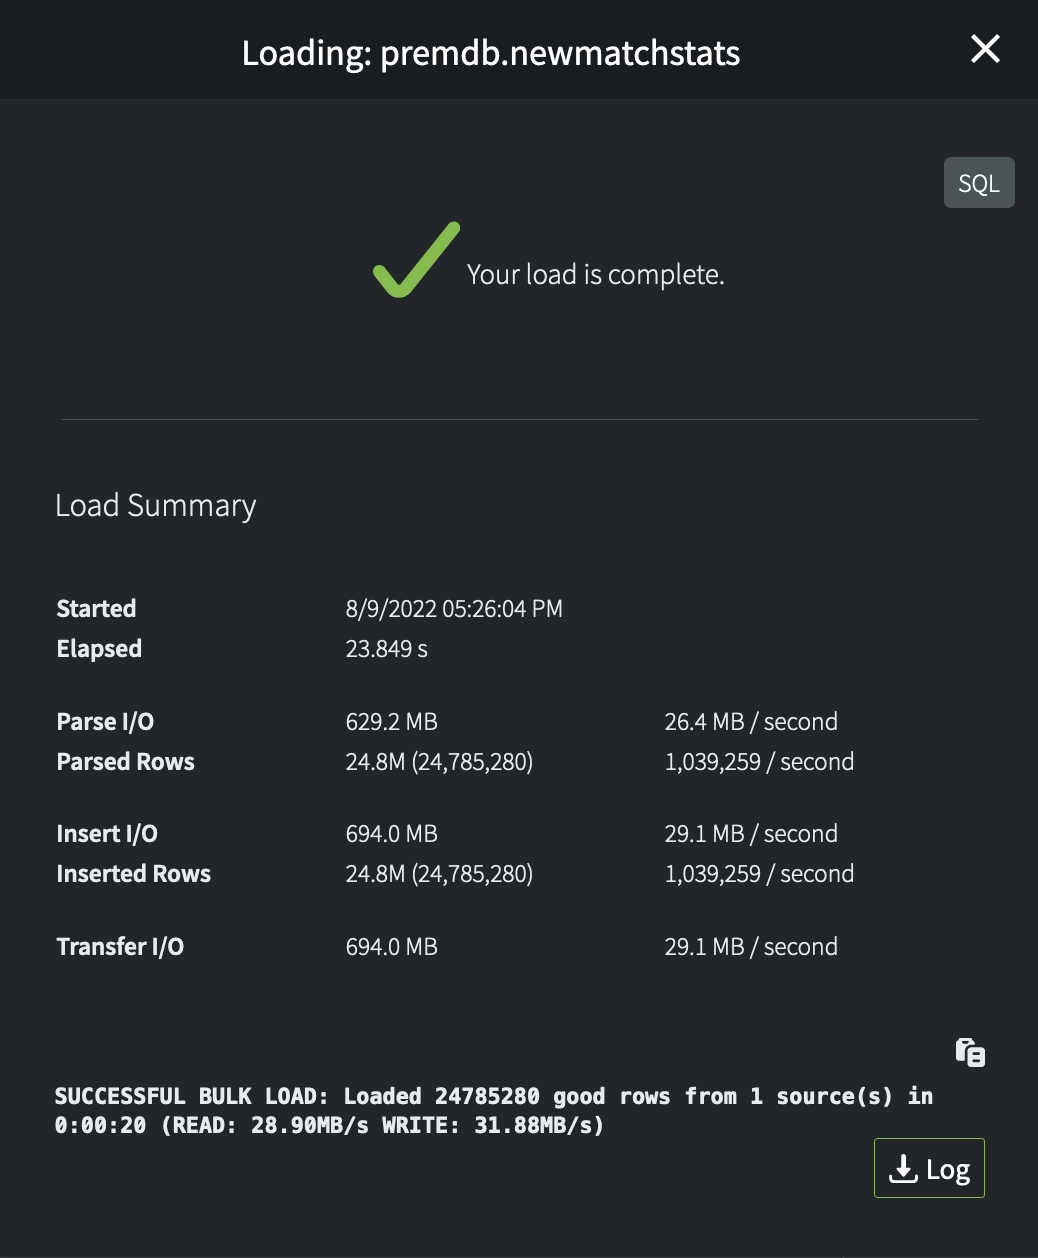
Click the Log button if you want to download and inspect the log file for the load.
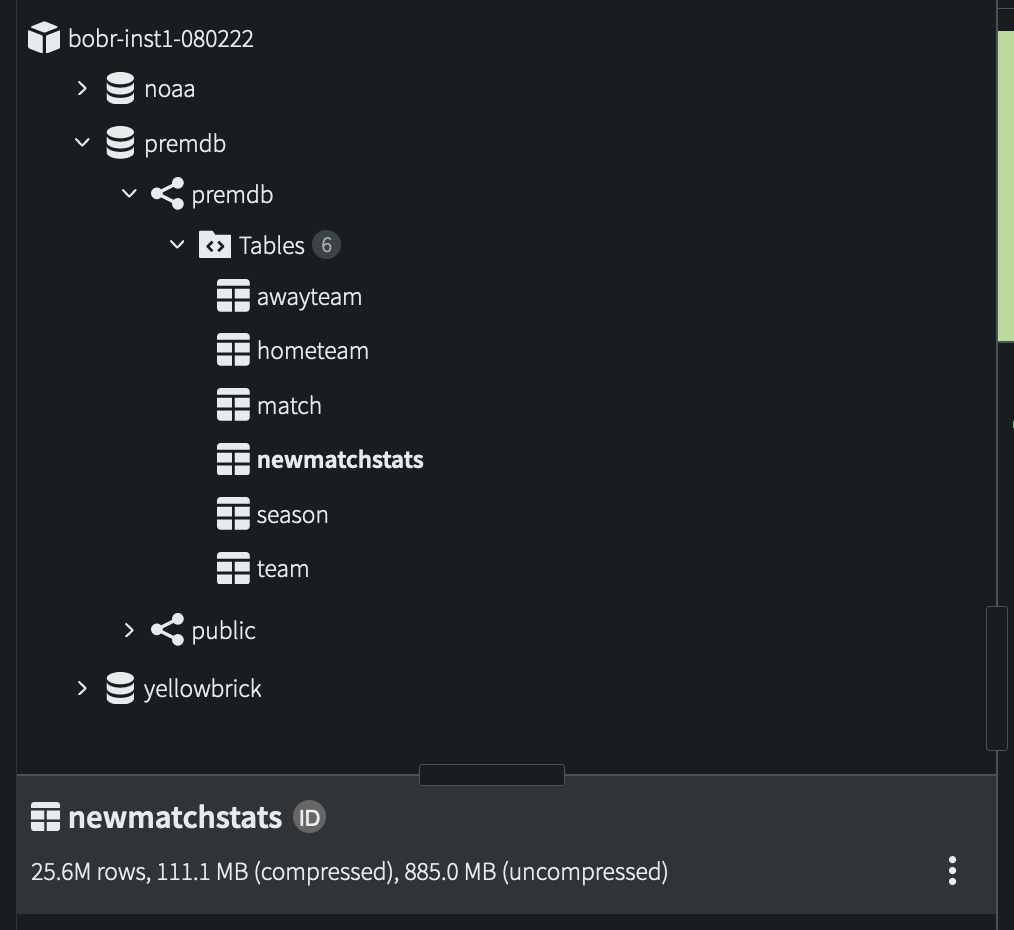
- Finally, in the Query Editor, select the table to check its updated contents (a total of
25.6Mrows, which includes the rows that were already in the table):
Notes on the Manage External Resources Option
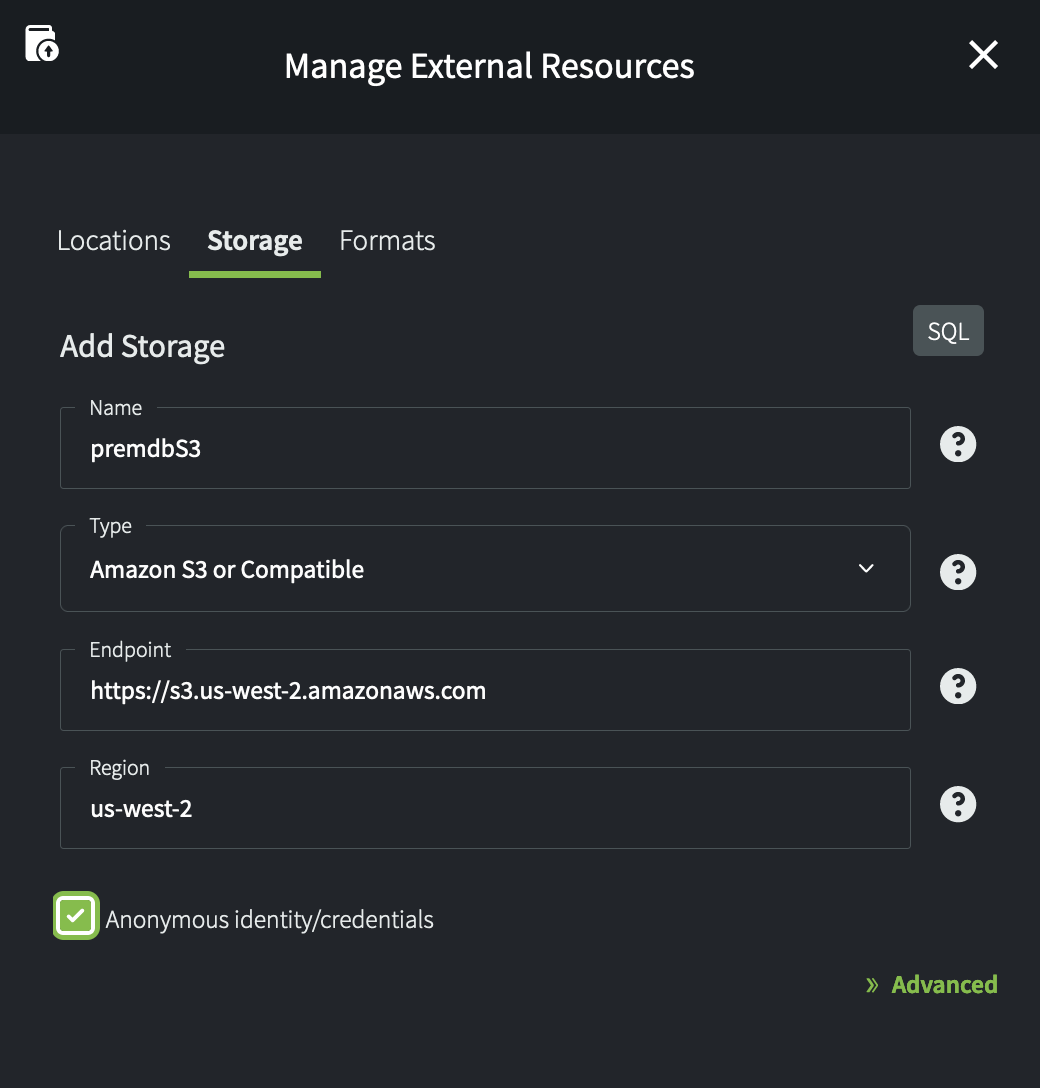
In this tutorial you used external resources (objects) that were already created for you in the script you ran to create the premdb tables. Alternatively, in the Load Assistant, you could click Manage External Resources and work through the setup of three different objects:
- An external storage object
- An optional external format object that describes the format of the source files in the bucket or container
- An external location that defines the bucket or container name
Tip: When you are creating these objects for the first time in Yellowbrick Manager, start by creating an external storage object. For example:
In the format section, click Next to use the default format (the format you just created). Alternatively, you could select another format from the drop-down list, or an alternative customized format (Customize Format).
Parent topic:SQL-Based Loads from External Storage