Appearance
Create a Route 53 Hosted Zone
You must create a hosted zone for your Yellowbrick deployment, using the AWS Route 53 service. A Route 53 zone assigns a custom domain name for a VPC, and provides access to that domain, as a subnet within the domain managed by your identity service provider (IDP).
Private and Public Hosted Zones
The type of hosted zone, public or private, specifies whether traffic is routed on the internet or within and among VPCs.
Yellowbrick requires the ability to register DNS records for many of the services that are created (CDWM, observability, and so on) so they are reachable by DNS name. When a private hosted zone is defined, it is important to configure DNS forwarding to the appropriate corporate DNS servers so that these services can be resolved by the end user’s network. This also has implications for certificates that are used to encrypt all network communication between components of the Yellowbrick Data Warehouse and terminate with the back end nodes themselves.
When you create a private hosted zone, you will need to identify the region and an existing VPC that the hosted zone is associated with (that is, the VPC you are going to use for the Yellowbrick installation.)
To Create the Hosted Zone
Use the AWS Console to create the hosted zone, after logging in with the same account that you intend to use for the installation itself.
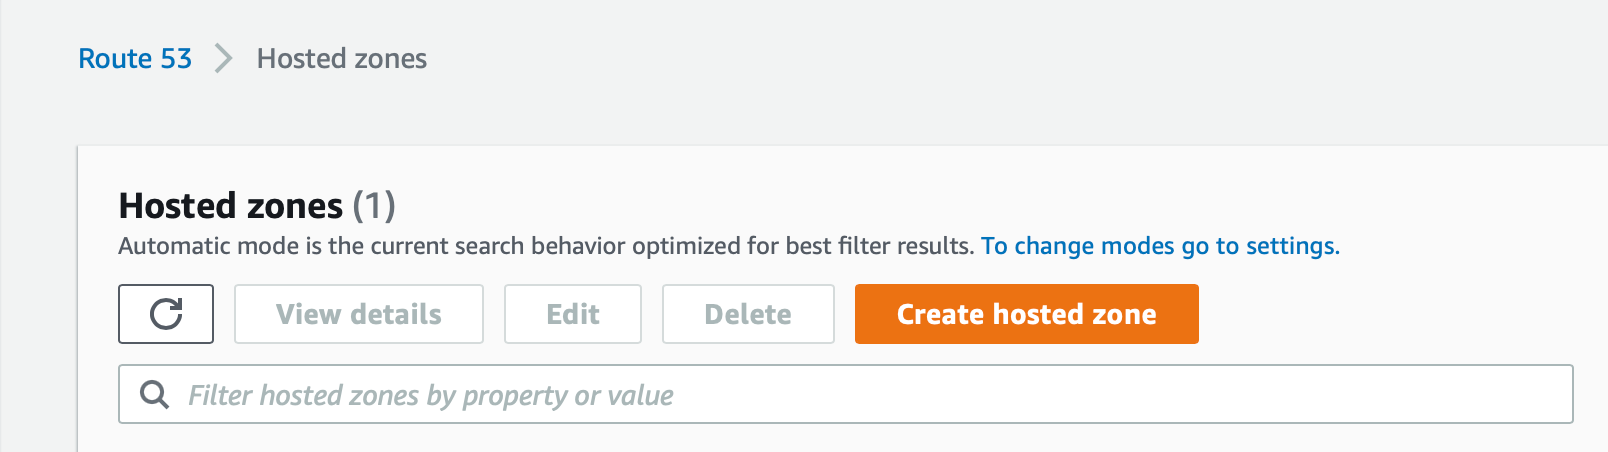
- In the console, go to Route 53 > Hosted zones > Create hosted zone:
- Create a sub-domain for your Yellowbrick installation. For example, if your corporate domain is
mycorp.com, a sub-domain might be calleddwcloud:dwcloud.mycorp.com.
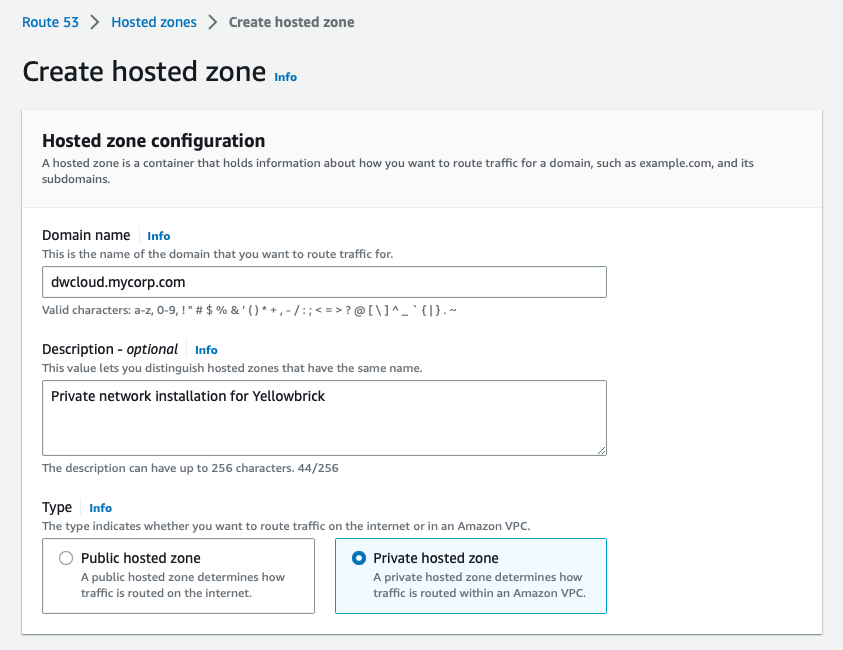
The type may be Public hosted zone (the default) for installation into a new VPC that has a public network with internet access, or Private hosted zone if you are going to use your own existing VPC on a private network.
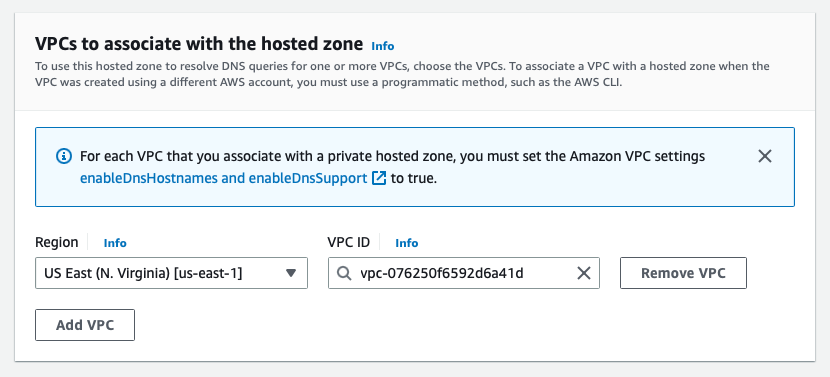
- If you selected Private hosted zone, select the region of the VPC you are going to use and the VPC ID. For example:
Tags are optional.
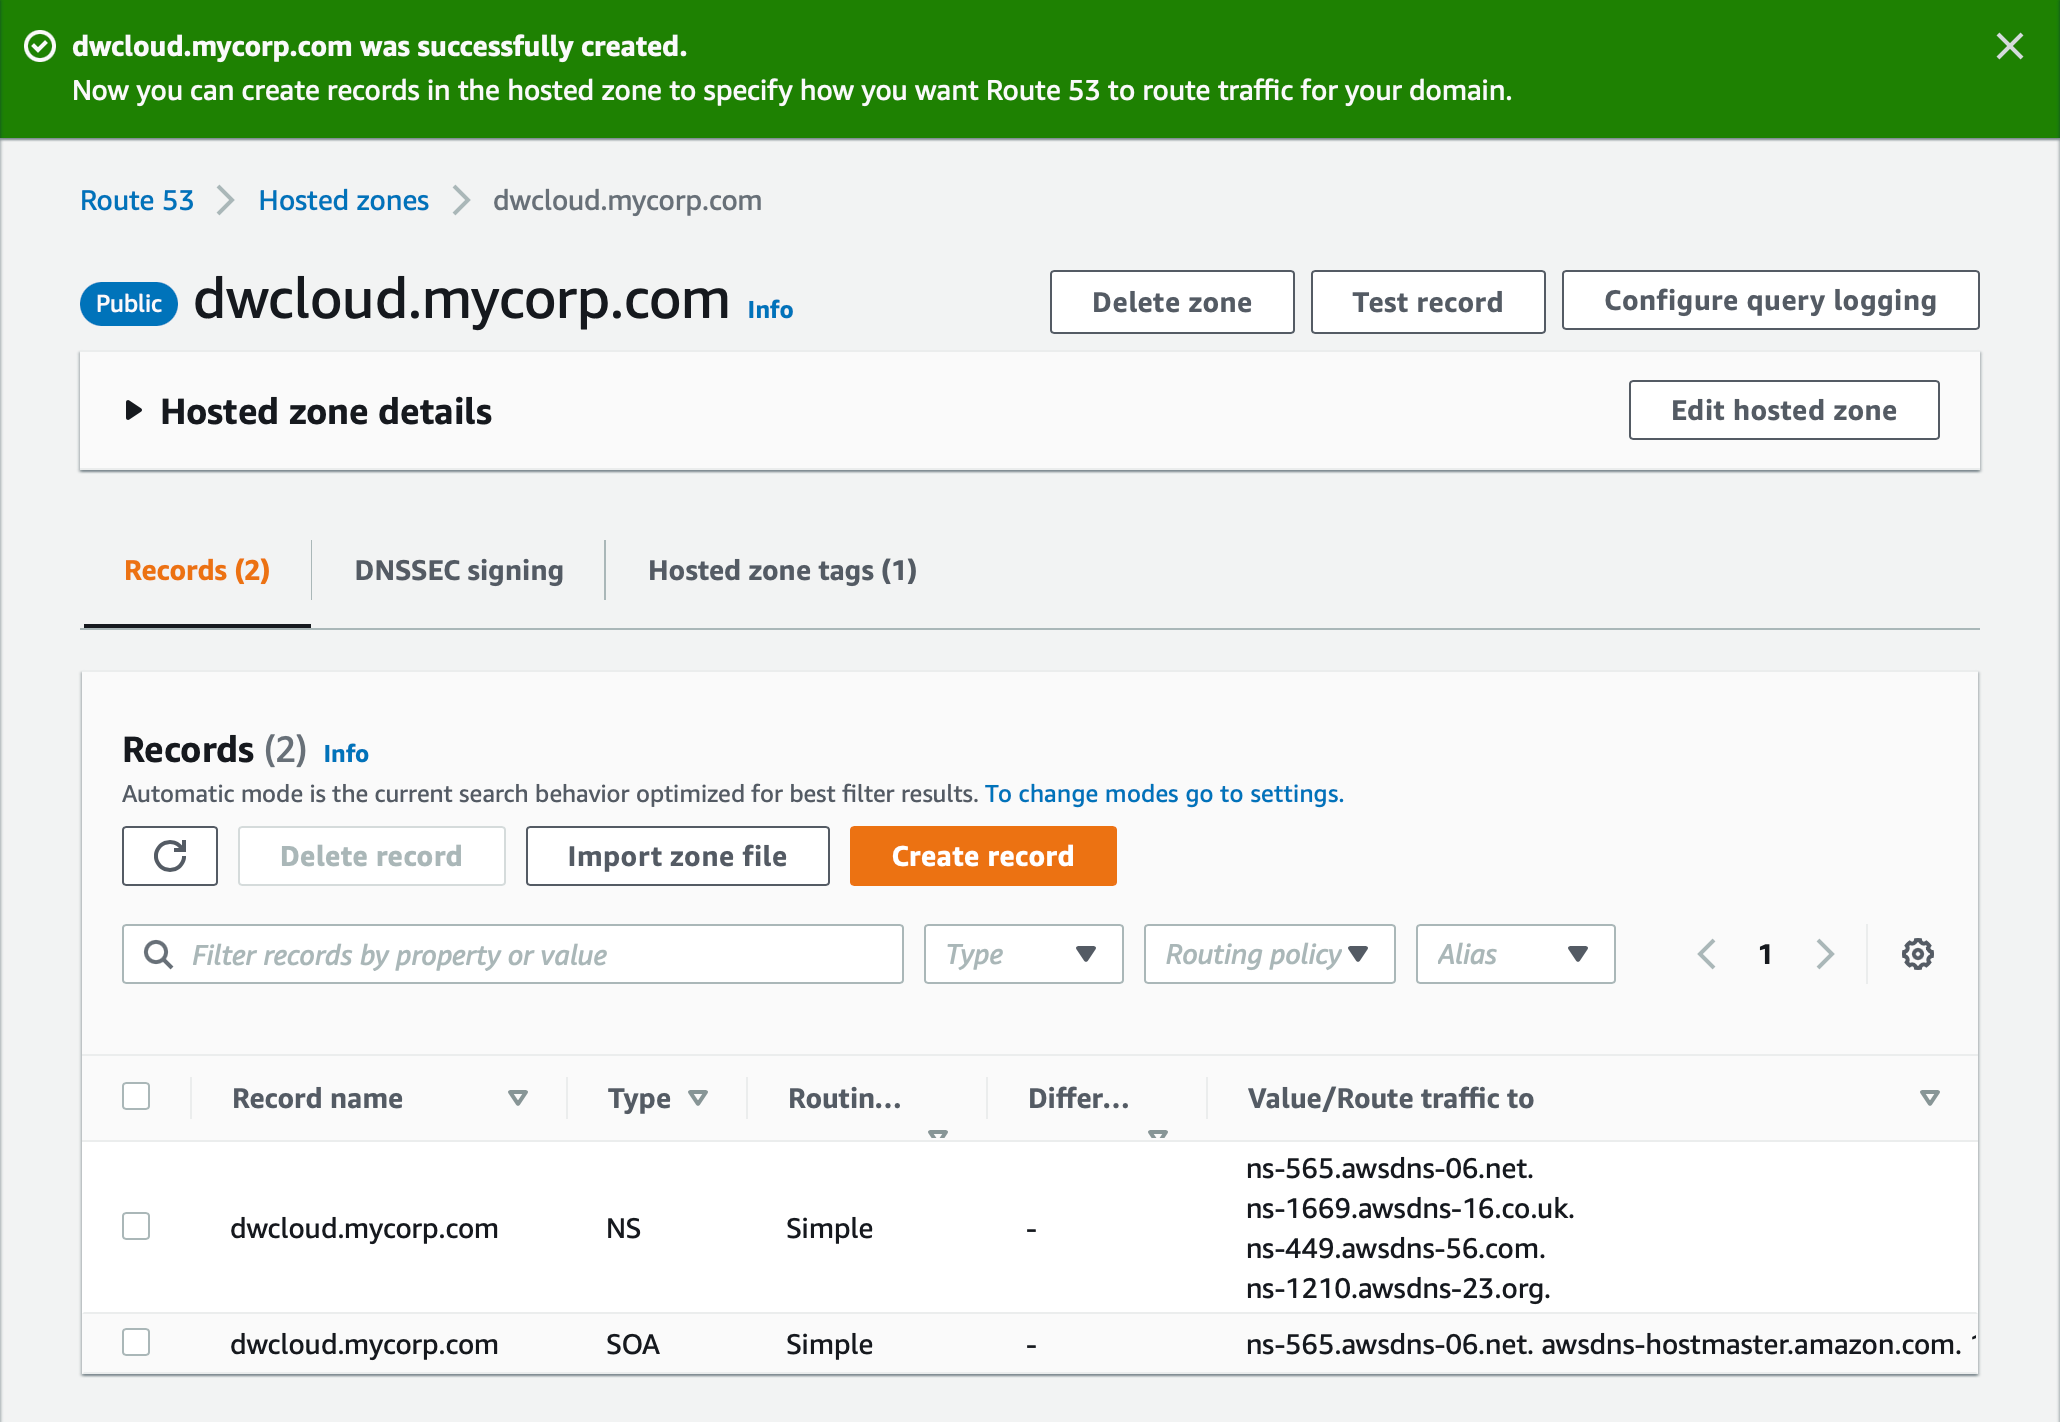
- Click Create hosted zone. The hosted zone will be populated with NS and SOA entries for routing traffic. For example:
- Contact the DNS administrator in your organization and request that this sub-domain record be added to the parent record for the company. How records are updated varies according to the requirements of specific third-party providers that host the domain in question.
- When the DNS administrator has completed the previous step, run a
digcommand to verify that the hosted zone is set up correctly. This command should return thens-*entries that were generated for the hosted zone. For example:
% dig +short NS dwcloud.mycorp.com
ns-565.awsdns-06.net.
ns-1669.awsdns-16.co.uk.
ns-449.awsdns-56.com.
ns-1210.awsdns-23.org.
Behavior When Multiple Route 53 Zones Exist in a Hierarchy
During installation, the Kubernetes external-dns software attempts to create DNS records in the most-specific variant when multiple Route 53 zones are present in a hierarchy. For example, assume your environment has the following zones:
mycompany.devinternal.mycompany.dev
The external-dns software will attempt to create records in the more specific internal.mycompany.dev Route 53 zone, even if the domain and ID values specified in the installer were the values for mycompany.dev (the apex Route 53 zone).
When you create the Yellowbrick stack, you must either use and specify values for the most-specific variant, or use and specify values for a different DNS zone that does not have overlapping variants.
See also Networking options.
Parent topic:Preparing for a New Installation