Appearance
General Prerequisites
Before attempting to install a Yellowbrick deployment, make sure you have an Azure account with Access Control (IAM) privileges and a profile that defines access to your Azure environment. If you are new to Azure or unfamiliar with the work flows, see Get Started With Azure and Azure Cloud Training and Certification. These sites provide materials for learning how to design, deploy, and operate your infrastructure and applications on the Azure Cloud.
For Azure connections, you can log in directly through a browser (Management Console) or via the command line (azure-cli). Your account does not have to be set up for single sign-on (SSO); SSO is optional. You can also log in as an IAM user with valid credentials.
Dedicated Yellowbrick User
The Yellowbrick installer is based on Azure Resource Manager. The Resource Manager template will create cloud infrastructure in addition to installing the Yellowbrick software. The installer will need an Azure account to perform these actions.
The account performing the installation must have an owner role with administrator privileges. It is recommended that you use an IAM Managed Service Identity (MSI) account, dedicated to Yellowbrick.
For Azure connections, you can log in directly through a browser (Azure Portal) or via the command line (azure-cli). Your account does not have to be set up for single sign-on (SSO); SSO is optional. You can also log in as an IAM user with valid credentials.
Dedicated Resource Group
The installation of a Yellowbrick deployment requires a resource group, a container for storing and managing all related resources. It is recommended that you use a dedicated resource group for each installation to start with a clean slate. See Create a Resource Group.
Region and Preferred Availability Zone
Note that setup of your Azure account determines the region and preferred availability zone (AZ) in which you will install the Yellowbrick deployment. You may want to check with your Azure enterprise support representative ahead of time for insight about hardware availability in specific zones. Currently, Yellowbrick Cloud Data Warehouse installs into one region with multiple AZs. The installer offers a choice of regions and zones.
You will be asked to provide your Azure account ID and preferred AZ to the Yellowbrick support team who will guide you through the installation process.
Azure Cloud Shell
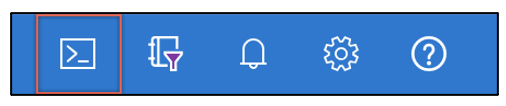
You can access and manage Azure resources directly from the Azure Portal through the Azure Cloud Shell. Azure Cloud Shell can be used with Bash or Azure PowerShell. To access Azure Cloud Shell, select the terminal icon from the menu at the top of the Azure Portal.
azure-cli
Alternatively, you may want to have a current version of the azure-cli tool available on the client system that you can use to do certain administration tasks. azure-cliis the Azure Command Line Interface, a tool for managing various Azure services.
Check that the CLI is installed:
% which az
/opt/homebrew/bin/az
% az --version
azure-cli                         2.39.0
...
Log in to your Azure account:
Note: This command will open the default browser and initiate an authorization code flow to load an Azure sign-in page. Select your account and then close the browser when the process is complete.
% az login

A web browser has been opened at https://login.microsoftonline.com/organizations/oauth2/v2.0/authorize. Please continue the login in the web browser. If no web browser is available or if the web browser fails to open, use device code flow with `az login --use-device-code`.
[
  {
   "cloudName": "AzureCloud",
   "homeTenantId": "912d4ba3-3f81-477a-90c6-caa2ee5521db",
   "id": "********-****-****-****-************",
   "isDefault": true,
   "managedByTenants": [],
   "name": "**-***-systems-test",
   "state": "Enabled",
   "tenantId": "********-****-****-****-************",
   "user": {
     "name": "*****.*******@yellowbrick.com",
     "type": "user"
   }
  }
]
You can check your current Azure configuration as follows:
% cat ~/.azure/azureProfile.json

{"subscriptions": [{"id": "cbe05312-e455-4052-8923-6d8da4f5aa0a",
"name": "**-***-systems-test", "state": "Enabled",
"user": {"name": "*****.*******@yellowbrick.com", "type": "user"},
"isDefault": true, "tenantId": "912d4ba3-3f81-477a-90c6-caa2ee5521db",
"environmentName": "AzureCloud", "homeTenantId": "912d4ba3-3f81-477a-90c6-caa2ee5521db",
"managedByTenants": []}], "installationId": "8ed31c24-1c8e-11ed-a4fa-b2257a97820e"}%
As a simple test that your account is working as expected and you can access Blob Storage, you can run an az storage account ls command:
% az storage account ls
[
  {
   "accessTier": "Hot",
   "allowBlobPublicAccess": true,
   "allowCrossTenantReplication": null,
   "allowSharedKeyAccess": null,
   "allowedCopyScope": null,
   "azureFilesIdentityBasedAuthentication": null,
   "blobRestoreStatus": null,
   "creationTime": "2023-05-09T23:18:00.385992+00:00",
   "customDomain": null,
   "defaultToOAuthAuthentication": null,
   "dnsEndpointType": null,
   "enableHttpsTrafficOnly": true,
   "enableNfsV3": null,
   "encryption": {
...
kubectl
Optionally, you may want to install kubectl, a command-line tool for communicating with the control plane on a Kubernetes cluster.
Install kubectl locally:
% az aks install-cliVerify kubectl is installed:
% which kubectl

/usr/local/bin/kubectl
For more information, check the azure kubectl page.
AKS Outbound Type
The default AKS cluster egress outbound type is Load Balancer. If you opt to use the User Defined Routing option instead, it must be created prior to the installation or the deployment will fail. For more information, see Customize Cluster Egress with a User-Defined Routing Table in AKS.
Parent topic:Preparing for a New Installation