Appearance
Create Stack
You can create stack using AWS CloudFormation by following the steps given below:
- Launch AWS CloudFormation Console
- The CloudFormation console will open, and the Create Stack wizard will appear with the template URL pre-populated.
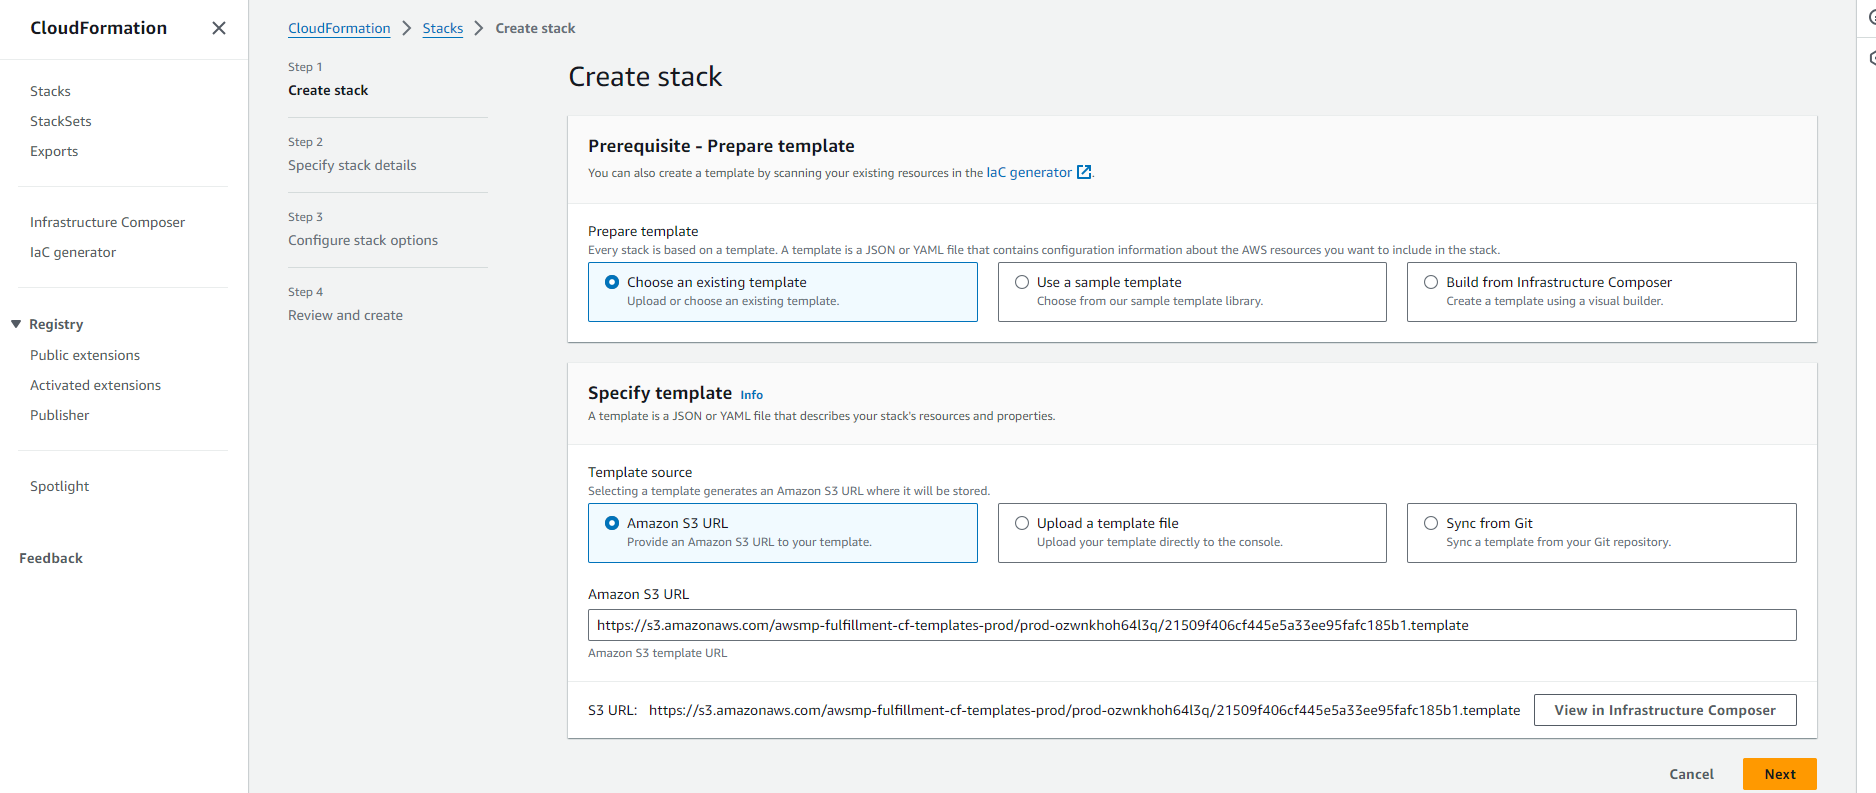
Stack Creation
Click on Next to fill out the different stack details:- Stack Name: Enter a unique name for your stack.
- Parameters: Input specific parameters:
- VPC: Choose the VPC, which you created as a part of prerequisites.
- Subnet: Choose the Subnet belonging to the above VPC.
- SSH key name: Choose the key pair, which you created as a part of prerequisites.
- Allowed external access CIDR: Enter your public IP address (recommended) or 0.0.0.0/0.
Note: This field cannot be left blank.
Continue configuring required options. Review the settings you have configured, and check the resources that will be created by the stack. If everything looks good, click Submit.
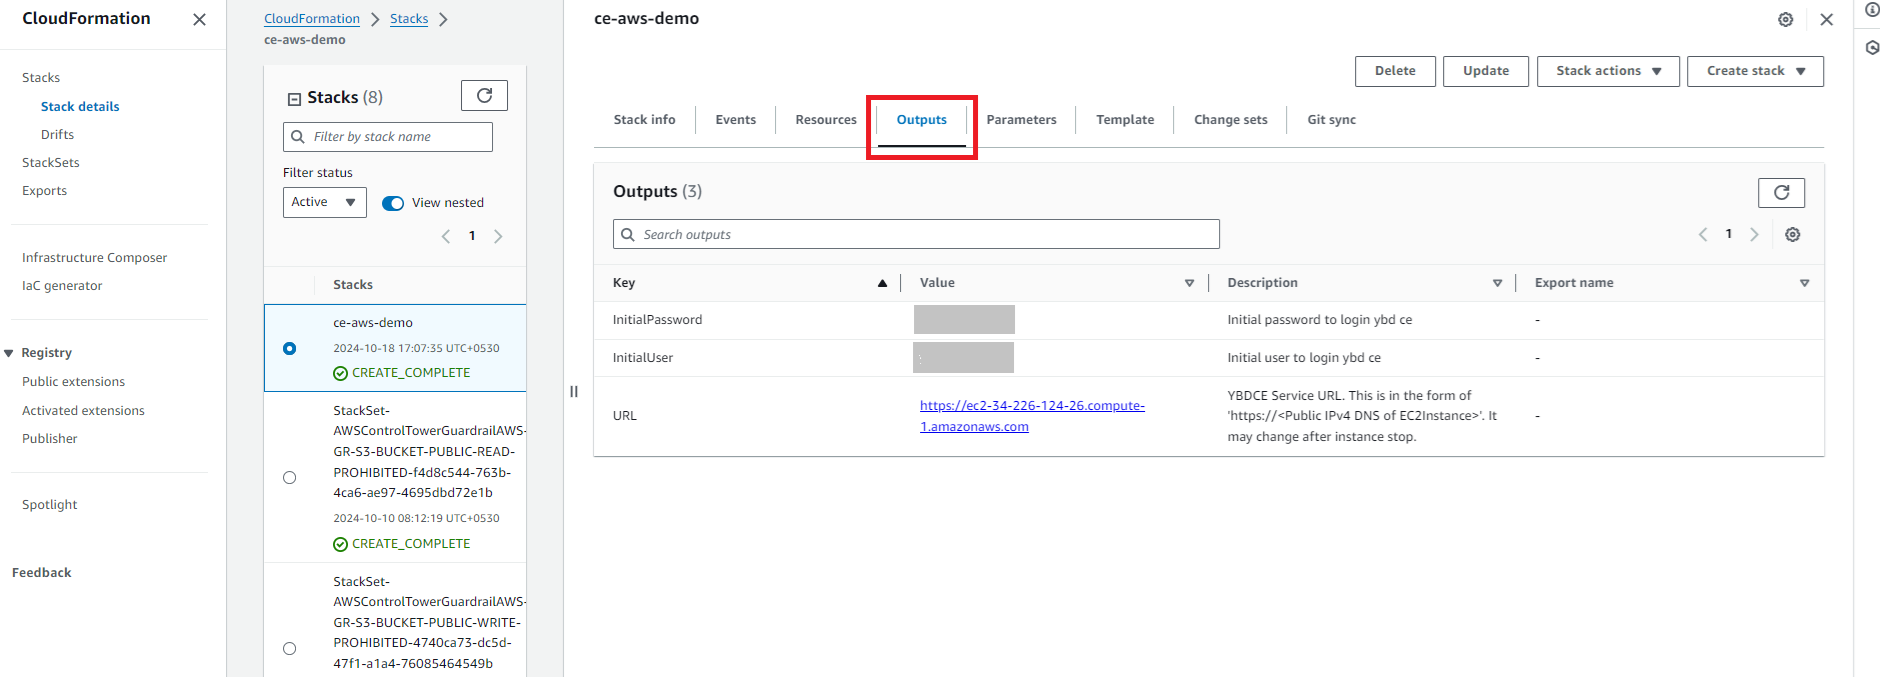
Monitor Stack Creation
- AWS CloudFormation will begin creating the stack and provisioning the resources based on the template.
- You can monitor the progress in the CloudFormation console under the Events tab.
- Stack Creation Complete
- The creation of the CloudFormation stack may take several minutes.
- Click the refresh icon to view the latest status of the stack creation.
- The status will initially show as CREATE_IN_PROGESS and will change to CREATE_COMPLETE once the process is finished.
- Login to YBD CE
- Navigate to the Outputs section to know the URL and the credentials initialuser and initialpassword required for logging into Yellowbrick Community Edition.
Once you are done using the instance, you may want to stop or delete it, along with its associated resources. To know more, click here.