Appearance
Walkthrough tour
This walkthrough shows how to get a trial license, create a couple of compute clusters, load some data and run some queries. The walkthrough assumes that you've completed a public installation of Yellowbrick.
The steps are as follows:
- Request and install a trial license.
- Create two compute clusters: one for data loading and one for querying.
- Load some data.
- Create a new role and some users.
- Run some queries.
- Connect with a third-party tool, DBeaver.
Note: The following instructions contain screen shots from an AWS instance, but the steps are largely the same for other cloud platforms. You'll just need to consider any security credentials and object storage URLs and alter them accordingly.
1. Request and Install a Trial License.
After logging into Yellowbrick Manager you will see a banner at the top of the page saying your installation is unlicensed. Click the link contained within it or navigate to Instance Management → Instance Management → License to apply for a trial license. Instance Management is the cube icon in the leftmost pane. The trial license will be delivered by email in a couple of minutes. Remember to check your Junk/Spam folder. Press Install a License and paste the license into the text field. You'll be granted a 30-day free trial license for up to 128 vCPU.
2. Create Two Compute Clusters.
Yellowbrick Manager supports creating and managing multiple instances, but initially there's only the one that you named in the Deployer. It will be selected in the Instance dropdown at the top-left of the screen.
We want to create two compute clusters: One for loading data (called small-load) and one for running queries (called small-query). Although it's not strictly necessary to load and query on separate clusters, it's an architectural best practice for resource isolation, so that running large loads, ETLs and data transformation doesn't impact business users running queries.
Navigate to Instance Management → Compute Clusters. You'll see an empty grid since you haven't got any compute capability at the moment. Press the ⊕Cluster button. Create a compute cluster called small-query with 1 small node. When you create a compute cluster, you can choose a node type based on T-shirt size, such as small-v1 or large-v2. Right now we support small (less vCPU and storage) and large (lots of vCPU and storage) node types. The underlying cloud hardware instance type the selection maps to is shown underneath. Cloud vendors add newer hardware instances over time, so we version the nodes as v1 or v2 etc. for backward compatibility.
Call your compute cluster small-query and give it one small node (latest version). For everything else, keep the default settings: Automatically suspend on idle after 5 minutes (to save money); automatically resume (when queried in a suspended state, but it might make the first queries take a few minutes); no need for it to be initially suspended; and keep the default workload management profile which governs concurrency and quality of service.
It will take a couple of minutes for the cluster to be created because Yellowbrick has to wait for Kubernetes to acquire and provision the underlying hardware instances.
Then, repeat the process and create a second cluster called small-load. When you're done, you should see two compute clusters in the grid on the screen.
3. Load some data.
Navigate to Query editor (the >- icon on the leftmost pane). Load some sample data by clicking the Sample Catalog button above the query editor, then choose ⚽ Premier League Database. Choose Setup/Load 1. It will prompt you to create a database called yellowbrick_trial, which you should agree to.
The query editor window will be prepopulated with all the SQL necessary to create tables, populate some records and load data from a bucket in Amazon S3.
In the Cluster drop down, choose small-load so that data is loaded via the load cluster. Make sure the yellowbrick_trial database is also selected. Then press ►Run to execute all the SQL. This may take a little while, especially if the compute cluster is suspended. If things go according to plan, on the left pane you'll see a premdb schema inside the yellowbrick_trial database, with five tables present.
You can take your time to read and study the SQL if you'd like to learn by example.
Then run some SQL to populate some extra data into a newmatchstats table. To do so, clear the contents of the SQL editor. Go back to the Sample Catalog, choose ⚽ Premier League Database and select Setup/Load 2. Execute the SQL which will run some statements to populate a newmatchstats table with 774,540 rows.
4. Create a New Role and Some Users
The next step is to create a role and some users. Continue to use your initial login credentials for this step, which will give you the privileges of the consumer role. This role includes permissions to alter, create, drop, and view roles and users. (Alternatively, you could use the predefined securityadmin or useradmin role.)
Navigate to Instance Management → Access Control → Roles tab then click ⊕Role. Create a role called analyst with no default cluster, no membership of existing roles, no users and no additional system privileges.
Click the Users tab and press ⊕User. Create two users belonging to the analyst role: ybtools10 and ybapps10. Set the default cluster for both users to small-query. Set passwords you'll remember. We recommend only using single sign-on with MFA for production use, however.
In the Query Editor, run SQL to grant USAGE on the two clusters you created to the analyst role:
sql
GRANT USAGE ON CLUSTER "small-query" TO analyst;You may also want to set the search_path for these users. For example:
ALTER USER ybtools10 SET search_path to premdb;
ALTER USER ybapps10 SET search_path to premdb;
5. Run some queries.
Navigate to the Query Editor. Grant table privileges to the analyst role so that members of that role can run queries. The analyst role requires SELECT privilege on all tables in the premdb schema for the premdb database.
sql
GRANT SELECT ON ALL TABLES IN SCHEMA premdb TO analyst;Log out of Yellowbrick Manager and log back in again as ybtools10. Be sure that the correct database (yellowbrick_trial) is set from the Database dropdown.
Navigate to the query editor and check that the current cluster and default cluster are as expected:
sql
SELECT * FROM current_cluster();
SELECT default_cluster();
Run a query against the database, for example:
sql
select t1.season_name, t1.winners, homegoals+awaygoals as total
from
(select season_name, winners, sum(substr(ftscore,1,1)::int) homegoals
from premdb.season, premdb.match
where season.seasonid=match.seasonid
group by season_name, winners) t1,
(select season_name, winners, sum(substr(ftscore,3,1)::int) awaygoals
from premdb.season, premdb.match
where season.seasonid=match.seasonid
group by season_name, winners) t2
where t1.season_name=t2.season_name
order by 1,2;
6. Connect with a third party tool, DBeaver.
As user ybapps10, set up a connection to the same database from a third-party tool, such as DBeaver. Download DBeaver then create a new database connection (Database → New Database Connection → Yellowbrick).
For example:
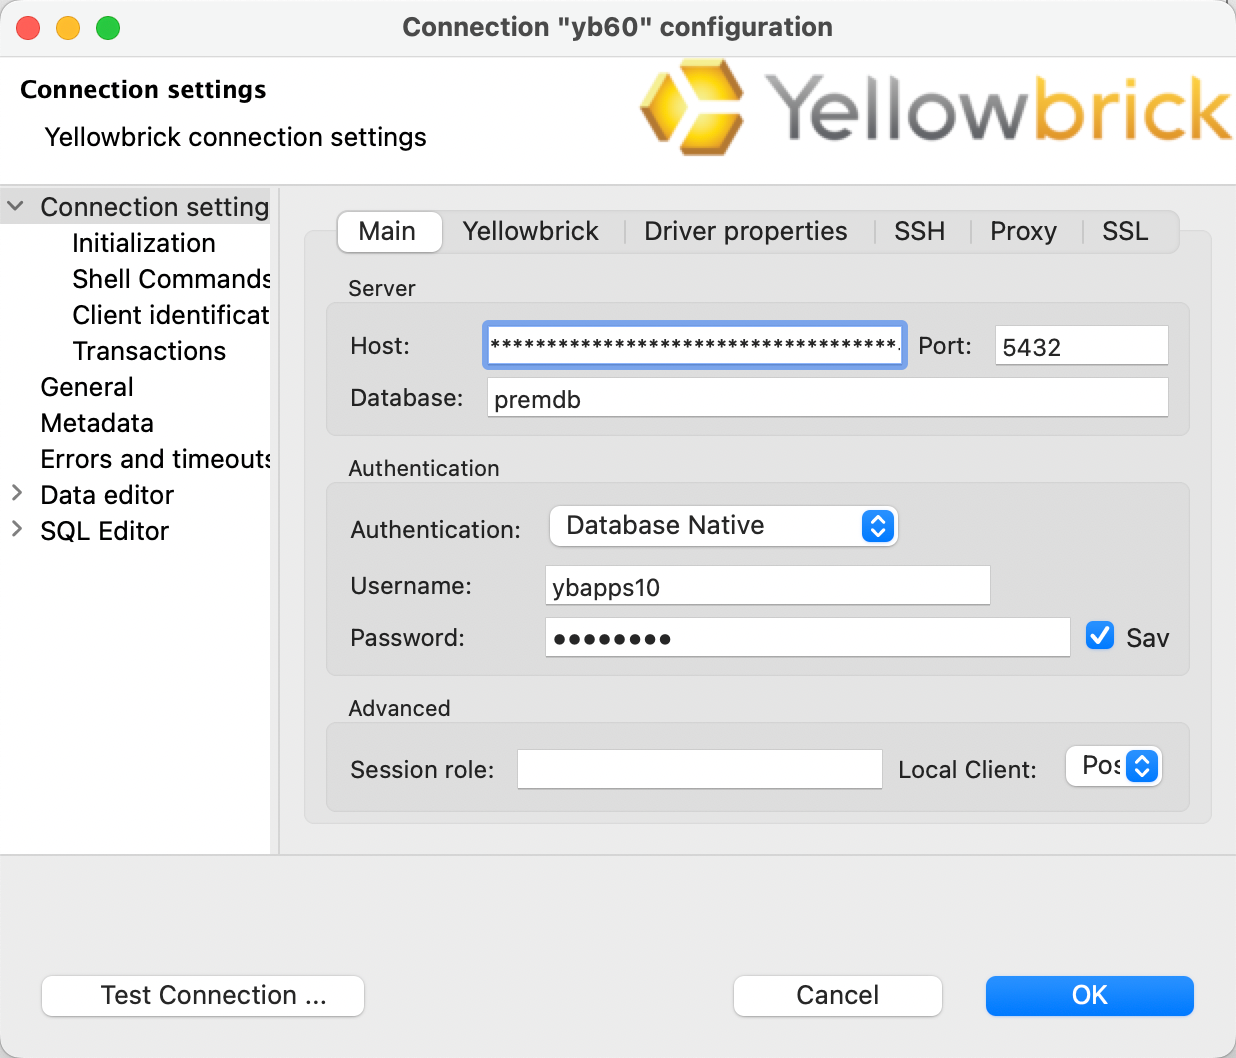
Then view the database in DBeaver:

Now you can run queries on these tables as user ybapps10.